Installing LOVE (and now ZeroBrane) on the Steam Deck - A Quick Guide
Posted: Sat Nov 12, 2022 11:41 pm
Hi,
So, ive been recently inspired to learn gamedev with Lua and wanted to use my steam deck as the developemnt machine (and only the deck) to emulate the bedroom coders of the 80s on their microcomputers. However, this led to me very quickly finding out that the flatpak version of LOVE doesnt work very well on the deck, and there doesnt appear to be a way apparent that will allow you to point your own interpreter to the LOVE executable. Thankfully, the chaps on discord have been instrumental on helping me find a workaround, and thankfully its rather simple.
This guide will also install LOVE in such a way that it avoids being a part of any system critical directories, meaning readonly mode does not need to be disabled and will therefore persist after a system update has been applied, so it will be a permenant installation.
1) Download the AppImage_X86_64 from the main homepage, and save it in your downloads folder
2) navigate to your /home/deck/ folder in Dolphin and create the directory you want LOVE to sit in (i chose love2d - so /home/deck/love2d/). Once the directory is created, place the appimage file into this directory.
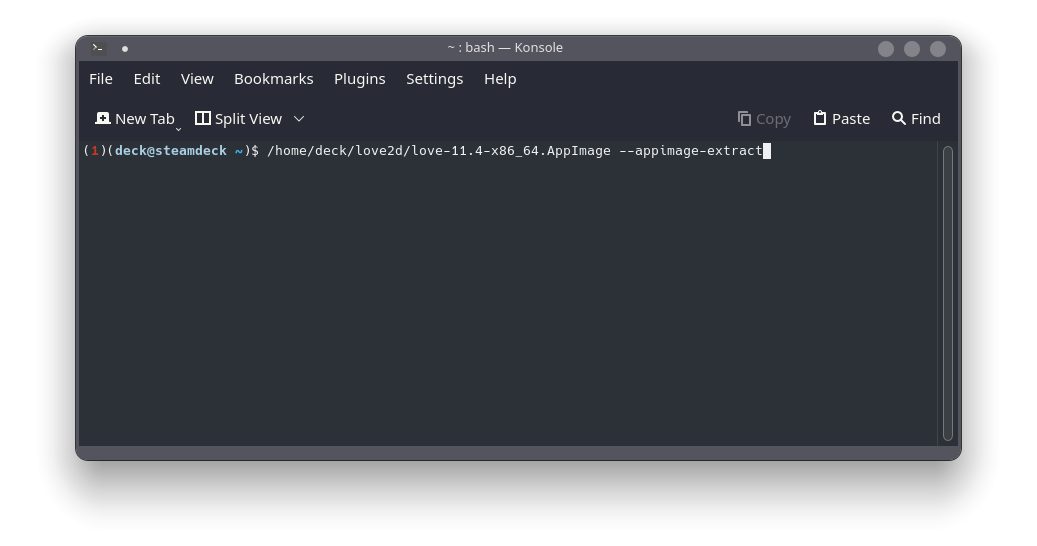
3) open up Konsole and drag the appimage icon into your Konsole, this should populate the command with the full filepath. on the end of this add on --appimage-extract and then press enter .
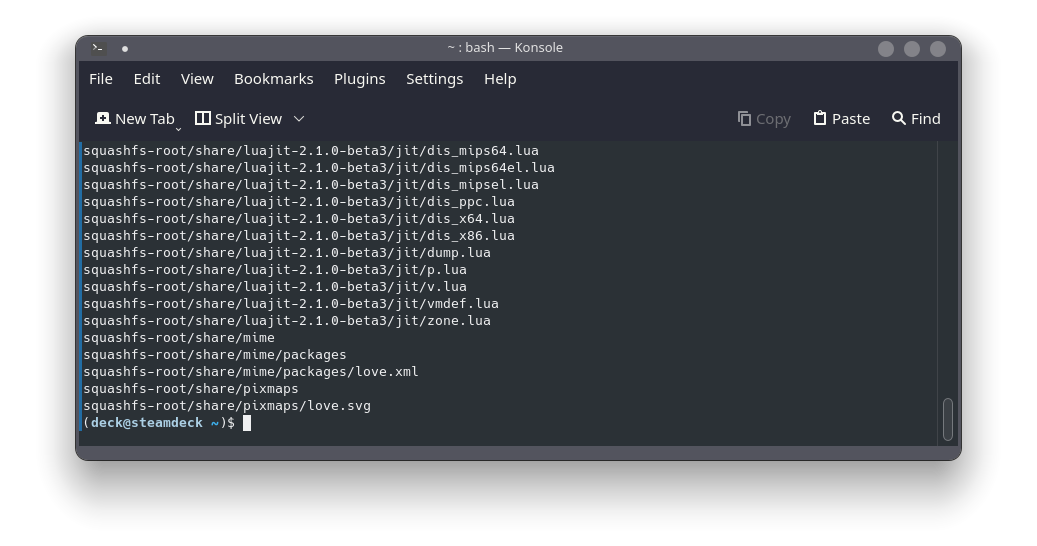
4) the appimage should extract almost instantly. you should see this if it has been done correctly
5) once done, go up a level into /home/deck, and in here you should see the squashfs-root folder in here now. It will easily be identifiable as the folder icon should have the LOVE logo on it. Right click this directory, click Rename, and then rename it to the same folder that you placed your appimage file into (i.e. love2d, if you used my example). This will come up with a naming conflict and ask what you would like to do. chose "Write Into..."
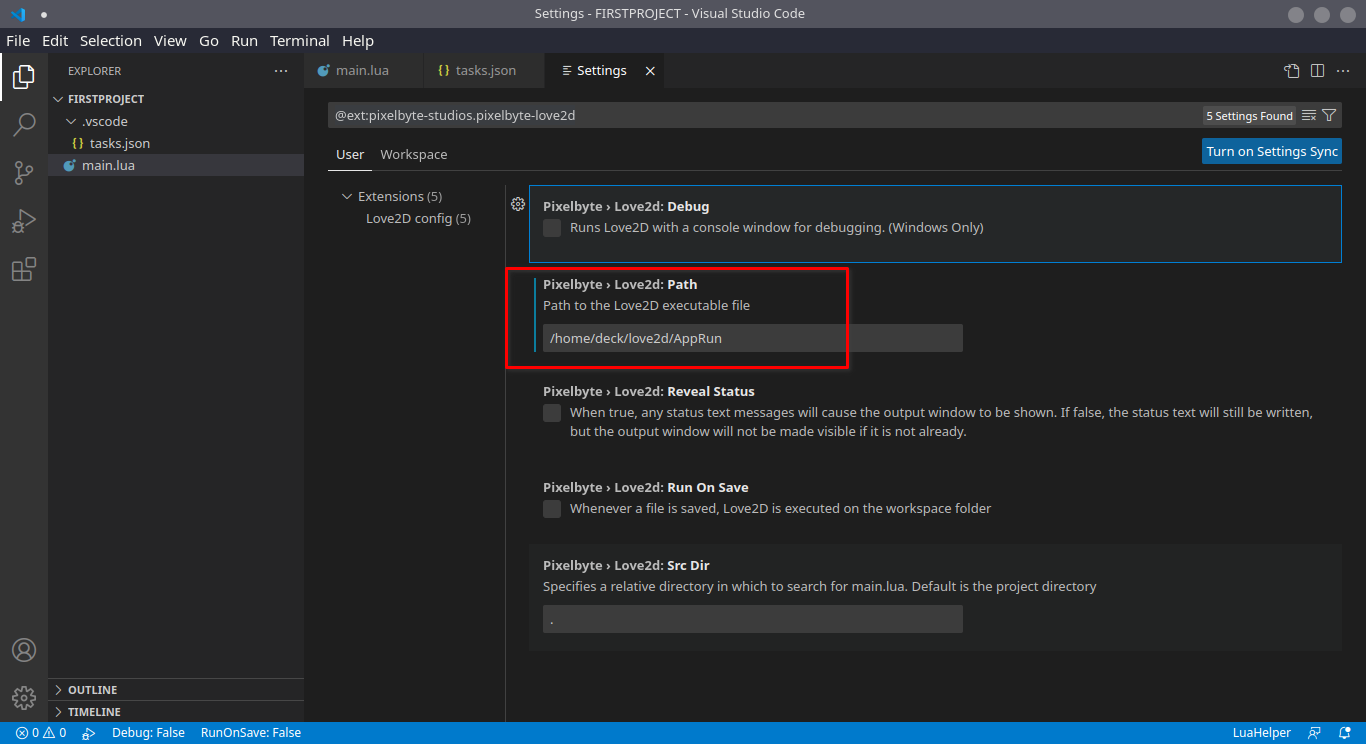
6) This is now complete. You will notice in this folder there is an executable in here called "AppRun". This is file you will want your interpreter to point to when setting up LOVE within it. For example. here is a screenshot of mine set up in Visual Studio Code -
This should be all. Once i learn how to actually script and code i plan to make a little installer to streamline this process, but given ive had to make this post before i have even learned and wrote my first line of Lua, then it might be a short while.
So, ive been recently inspired to learn gamedev with Lua and wanted to use my steam deck as the developemnt machine (and only the deck) to emulate the bedroom coders of the 80s on their microcomputers. However, this led to me very quickly finding out that the flatpak version of LOVE doesnt work very well on the deck, and there doesnt appear to be a way apparent that will allow you to point your own interpreter to the LOVE executable. Thankfully, the chaps on discord have been instrumental on helping me find a workaround, and thankfully its rather simple.
This guide will also install LOVE in such a way that it avoids being a part of any system critical directories, meaning readonly mode does not need to be disabled and will therefore persist after a system update has been applied, so it will be a permenant installation.
1) Download the AppImage_X86_64 from the main homepage, and save it in your downloads folder
2) navigate to your /home/deck/ folder in Dolphin and create the directory you want LOVE to sit in (i chose love2d - so /home/deck/love2d/). Once the directory is created, place the appimage file into this directory.
3) open up Konsole and drag the appimage icon into your Konsole, this should populate the command with the full filepath. on the end of this add on --appimage-extract and then press enter .

4) the appimage should extract almost instantly. you should see this if it has been done correctly

5) once done, go up a level into /home/deck, and in here you should see the squashfs-root folder in here now. It will easily be identifiable as the folder icon should have the LOVE logo on it. Right click this directory, click Rename, and then rename it to the same folder that you placed your appimage file into (i.e. love2d, if you used my example). This will come up with a naming conflict and ask what you would like to do. chose "Write Into..."
6) This is now complete. You will notice in this folder there is an executable in here called "AppRun". This is file you will want your interpreter to point to when setting up LOVE within it. For example. here is a screenshot of mine set up in Visual Studio Code -

This should be all. Once i learn how to actually script and code i plan to make a little installer to streamline this process, but given ive had to make this post before i have even learned and wrote my first line of Lua, then it might be a short while.